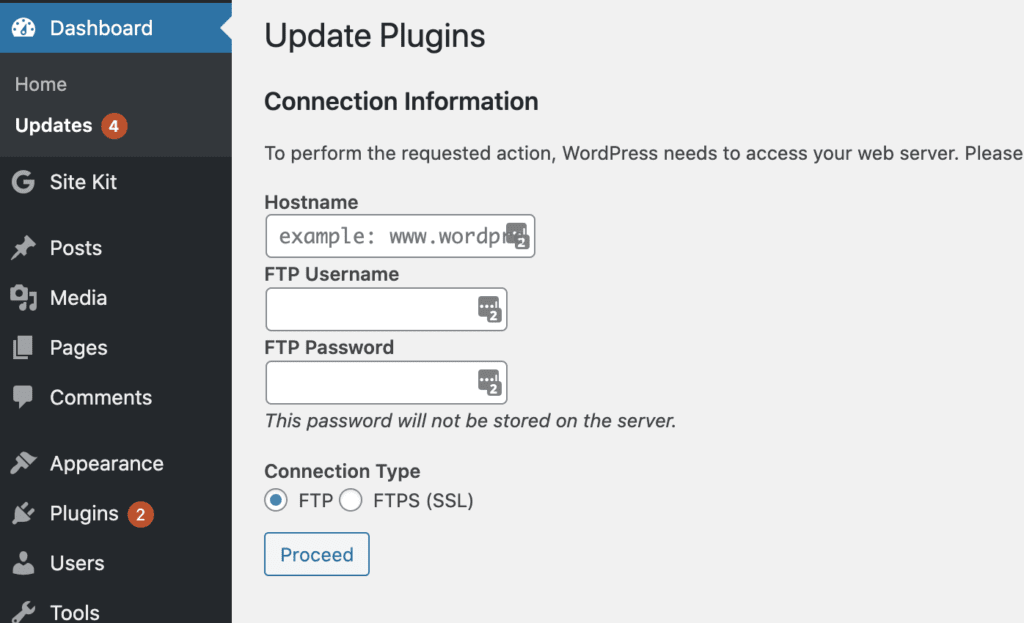
I was recently working with a new Windows app we built at CleanBrowsing and our users were getting hit with security warnings post-installation. This warning was generated because the app was not signed.
Ok, let’s get things signed.
To sign I would need a code-sign certificate. I went through the process of getting an Extended Validation (EV) certificate from GlobalSign.
Site Note: The process was not too bad, you sign some forms, take some pictures and you’re done. You do need a Windows machine when download the certificate, be prepared for that.
Over the past year I have become a bigger proponent for platform like Mastodon. With such adoption, some things are not always as clear as you might expect them to be.
In this instance I wanted to change from one user to another. Example:
user1@noc.social to user2@noc.social
It is possible, but not as seamless as you might have come to expect from other experiences.
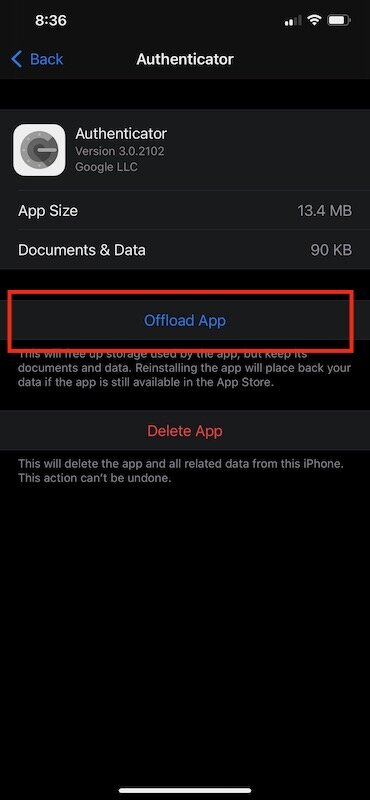
If you do, be mindful that some apps might not load. For me, it was the Google Authenticator app. This was especially concerning because I use it for Two Factor Authentication (2FA) on a lot of systems.
The solution is simple, and all credit goes to Nick Lowe for sharing it:
Are you having an issue with Google Authenticator after updating to iOS 14.2 where it will then crash on load?
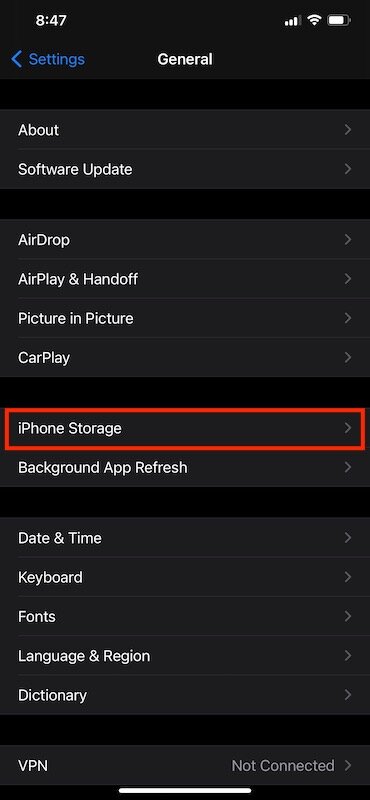
Go to Settings > General > iDevice Storage, tap on the Authenticator app, choose 'Offload App' and then install it again.
Made a bone head mistake this week. While testing on one of my machines I removed my user from the admin group, then changed the admin password. I also forgot to write down the admin password.
Yup, this means I now had a user configured that had no administrative privileges. Well, that sucks.
I was going to reimage the whole machine, but turns out there is an easier way if you are on Windows 10 and higher.
Enable Default Administrator Account
This is actually a pretty scary feature as it comes built into Windows 10 by default. You can enable the built-in Administrator account from the log in screen using the command prompt.
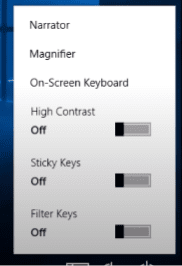
When you first boot your Windows device you’ll notice the following utility Manager:
You want to switch it so that when you click on it, it opens the command prompt instead of the utility manager. To do this you have to switch the programs, and you can do this by repairing the system.
1 – Boot From a Bootable Windows USB / Disc
You can make this change in your BIOS settings.
When the bootable disc opens, you’ll be be presented with the Windows Setup page, click NEXT.
The next page is going to ask you to INSTALL, don’t.
The bottom left you will see an option that read “Repair your computer“, click on it.
You will be presented with a few options, select “Troubleshoot“.
Select the “Command Prompt” option.
Here we’re going to swap the utility manager with the command prompt program.
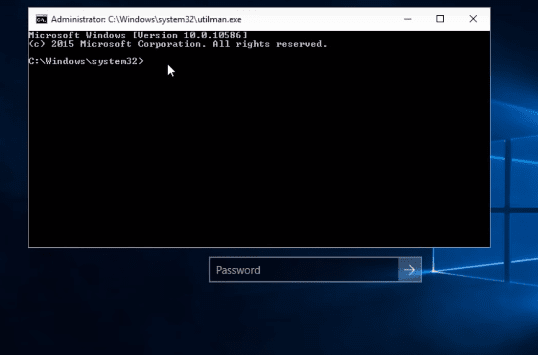
When your machine reboots, click on the same utility manager option on the screen. If done correctly, it should enable the command prompt:
Now type this:
net user administrator /active:yes
This will enable the default system administrator, which by design has no password. Assuming you’re not on an enterprise machine, you can bet that it is likely still enabled.
Reboot the machine.
3 – Log In as Administrator
When the machine reboots you will see a new user – Adminstrator – on the screen. Select that user and log in.
Assuming you have not disabled this user, it should work.
TIP: This is actually a very scary feature that can be easily misused by bad actors so I recommend removing this user, or creating a different one, that isn’t the default moving forward.
If you’re working in terminal you’re used to using the copy / paste functions. Simple, but a necessity; when it’s missing you can get frustrated very fast.
I ran into this wall using the Windows Subsystem for Linux (WSL).
Turns out, it’s disabled by default.
Enable Copy / Paste
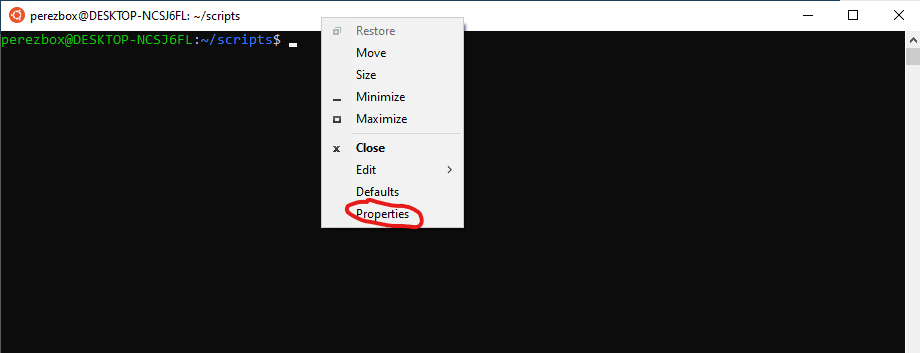
Enable it by opening the properties panel. You can access it by right-clicking the window pane header:
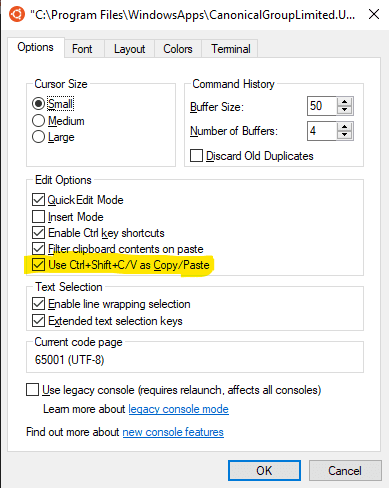
Then select the “Use Ctrl+Shift+C/V as Copy / Paste” option
That’s it. Now you can copy and paste, but if you’re coming from Mac, make note that you have to select the CTRL and SHIFT keys when making your Copy or Paste Selection.
Been playing with Windows lately on my quest to move off Apple devices. Something I am extremely excited about is how they have made Linux more integrated into the OS.
In my process, however, I ran across an interesting problem that yielded the following error when trying to install Linux .
Installing, this may take a few minutes… WslRegisterDistribution failed with error: 0x80370102 Error: 0x80370102 The virtual machine could not be started because a required feature is not installed.
This was extremely frustrating for a couple of reasons:
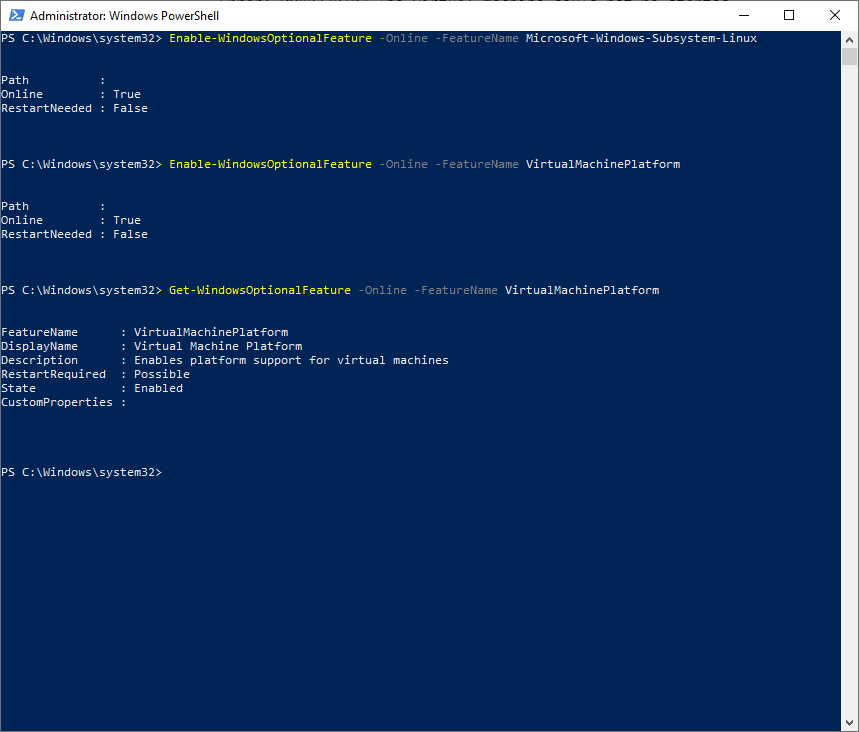
1 – Powershell was showing that Virtualization was enabled
2 – I could not find my virtualization option in Bios the way it was being recommend
Verify Virtualization Option In Your BIOS
In the end, I looked up my specific BIOS on Google and queried what they called Virtualization. It turns out, that for my specific motherboard (ASUS X570-PLUS) their virtualization option in the BIOS is called SVM Mode.
Enabling SVM Mode in the BIOS did the trick for me and I was able to proceed with my installation of Linux.
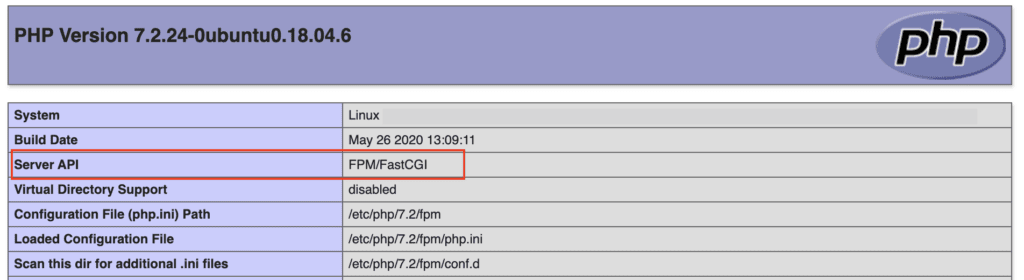
This post assumes you have successfully installed PHP-FPM and have confirmed it is running on the server, and
# systemctl status php7.2-fpm.service
● php7.2-fpm.service - The PHP 7.2 FastCGI Process Manager
   Loaded: loaded (/lib/systemd/system/php7.2-fpm.service; enabled; vendor preset: enabled)
   Active: active (running) since Thu 2020-08-13 03:40:43 UTC; 14min ago
Configured on the site:
But still getting this:
The good news is you are actually pretty close, and it’s actually something you missed in your site config file.
Go back and verify the port you’re listening on (e.g., vim /etc/php/7.2/fpm/pool.d/[pool name].conf). For instance, in my case it was:
DD-WRT is an OpenSource router firmware supported by most modern router systems. If you want to open the door to what you can do with your router, DD-WRT is the way to do it. It allows you to bypass the limitations your commercial router software introduces.
Ok, let’s cut to the chase..
Permission Denied Using SSH with DD-WRT
If you’re like me, you have probably hit a brick wall when trying to SSH into the router after it’s been imaged with DD-WRT.
Check All SSH Settings
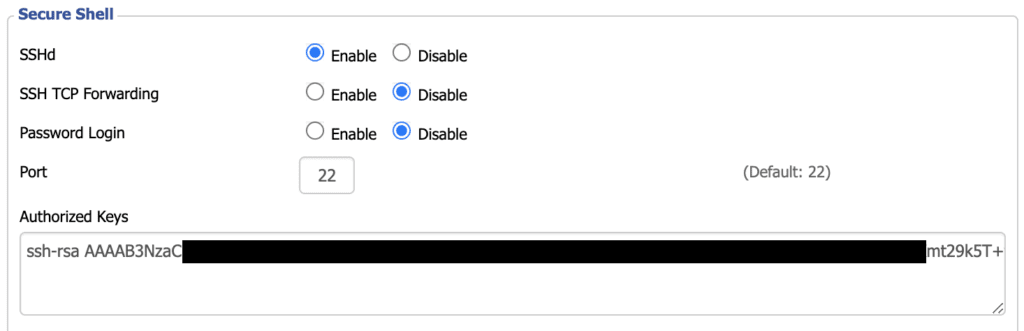
There are two place you want to update SSHD settings. Navigate to the following location
Services > Services > Secure Shell
Here, you will enable the SSHD daemon.
Make note of the port you’re using, and select to use a password or key or both. This is pretty straight forward, in my scenario I selected to disable password login and use my public SSH key for security.
Snapshot of Secure Shell Panel on Services Page
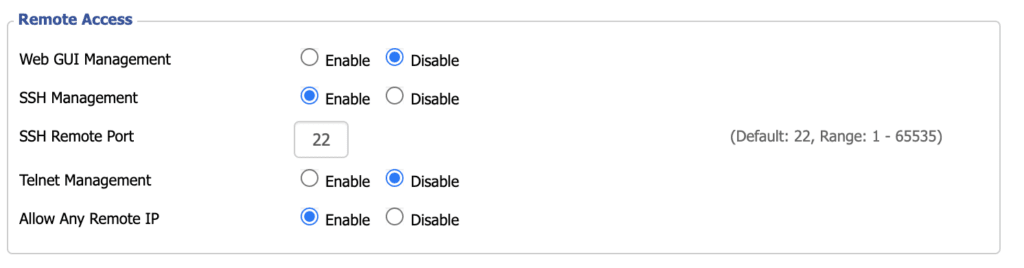
Then, navigate here:
Administration > Management > Remote Access
Don’t ask me why, but here you will make sure that SSH Management is Enabled and that your port is set the same as the last page.
Snapshot of Remote Access Panel on Management Page
Now save, and reboot the machine to make sure the changes stick.
Verify Username is Correct
If you are still having an issue, and it looks something like this:
$ ssh admin@192.168.1.1
DD-WRT v3.0-r44048 std (c) 2020 NewMedia-NET GmbH
Release: 08/02/20
Board: Linksys WRT3200ACM
admin@192.168.1.1: Permission denied (publickey).
or, something like this:
$ ssh admin@192.168.1.1
ssh: connect to host 192.168.1.1 port 22: Network is unreachable
tony:public antonioperez$ ssh admin@192.168.1.1
DD-WRT v3.0-r44048 std (c) 2020 NewMedia-NET GmbH
Release: 08/02/20
Board: Linksys WRT3200ACM
admin@192.168.1.1’s password:
Permission denied, please try again.
admin@192.168.1.1’s password:
Permission denied, please try again.
admin@192.168.1.1’s password:
But you swear you are using the same username and password you log into the GUI with, then it might be something a little more frustrating.
The user.
Update the user to root instead of whatever user you were using. In my case, I was testing with admin.
After updating the username to ROOT:
$ ssh root@192.168.1.1
DD-WRT v3.0-r44048 std (c) 2020 NewMedia-NET GmbH
Release: 08/02/20
Board: Linksys WRT3200ACM
Enter passphrase for key ‘/Users/antonioperez/.ssh/id_rsa’:
Tada! Like magic, it started working. I have no idea why this is, but I have successfully used this on three DD-WRT installations and it works every time.
Was recently working on a project, not using a CMS like WordPress and Daniel was making fun of me for requiring “.php” in my URL.
Naturally, that could not go without a response.
Example of What I wanted to Do
Example of what I’m talking about:
https://defragged.org/somdirectory/somefile.php
I wanted to remove the “.php” extension from the URL, so that it reads:
https://defragged.org/somdirectory/somefile
If this is you, then here is the quick and dirty on how to get this done.
How To Remove .PHP / .HTML from URL Slug
I am working on Apache and the latest version of Ubuntu, but it should be the same for most of the latest versions.
Because this is a test server, I wanted to do a global deployment so that I don’t have to worry about it anymore. This saves me from having to remember to do this in each web directory via an .htaccess file.
Navigate to your apache config file, something like this:
# vim /etc/apache2/apache2.conf
Scroll to the bottom, and append this to your file: